Showing posts with label sharing. Show all posts

Sunday, December 18, 2011

Sharing Sunday: At Home with Rebecka

athomewithrebecka


Another week, another fabulous blog. Rebecka is another mama I met via VoiceBoks. What caught me first were her thoughtful posts to other members. I knew I had to check out her site. What a pleasant treat it was! At Home with Rebecka is an incredible collection of recipes and she is currently my inspiration for good lighting and composition with food photography. There is so much to learn about this lovely lady, so read along and don't forget to give her a little visit.


Tell us about you & your blog.Becka


My passion for fine food and the art and joy of sharing it with friends and family is rooted deeply in the memories of cooking in the kitchen with my Mother and enjoying years of business dinners and entertaining business associates with my parents. With a heart full of thanks, I can say that my parents taught me how to entertain guests with grace and how to cook and eat adventurously.


My husband and I have been married for ten years. We are a blended family with 5 children. Blake loves his family and takes very good care of us unfortunately; his favorite condiment is ketchup so trying new recipes in our home is not an easy task. Thus, my outlet for my gourmet cravings is my blog.


I currently live in a small mountain town in Colorado where the sun shines 90 percent of the time and God’s creatures greet us every morning. I love singing opera and have performed in over 18 professional productions in my lifetime.


Music – Food - Family. It’s what makes my heart sing!


How long have you been blogging?


I started food blogging July 14, 2010.


How did your blog get started?


One evening while surfing the internet, I bumped into a food blog written by an old acquaintance. I read through her blog and immediately thought to myself…”I could do this!” I spent several nights researching other food blogs and blog platforms before beginning my site development. About two weeks later I was the proud owner of At Home with Rebecka. I began food blogging with the intent on sharing a few canning recipes and maybe a couple family favorites but now… I can’t stop!!


What started as a whim, turned into a deep love for food blogging, an immense passion for food writing, styling and food photography! I also have to confess, I’ve become a food competitor junkie!Beats Fig Tart


I’ve won several food and cocktail recipe competitions. My most recent win, the Real Women of Philadelphia Cookbook Challenge with my “Fig Tart with Philly Frangipani and Strawberry Ginger Cream”. My photo and recipe will be published in this season’s cookbook alongside recipes from other RWOP winners and Ms. Paula Deen! Yea! I also won $500! I think I’ll use my winnings to have my blog redesigned by a professional.


What are your favorite foods?


I can never decide on a favorite food and I will eat just about anything you put in front of me. I grew up in the South West so my taste buds are always hungry for a green chili, fish tacos and the like. I also enjoy cooking and eating all Asian cuisines and an American favorite: Grilled Flat Iron Steak with Garlic Mash and Soy Green Beans. Foods I don’t like to eat but will cook for others…goat cheese, cooked raisins and lamb!


Favorite restaurants?


I find it difficult to go out for meals. I really like eating out and trying new foods but I’m generally unhappy with the quality of the food and the flavor. Nothing is worse than spending good money for bad food! I’m sure there are hundreds of amazing restaurants in Denver; I just haven’t had the pleasure of dinning at one I can write home about in a very long time.


Favorite recipe?

A Delicious Holiday Appetizer
These little Phyllo Bites were also a smash hit at the party. Filled with a mixture of rich Saint Andre` goat cheese, cream cheese and sharp cheddar; the smooth creamy texture of the filling blended with the crunch of the phyllo pastry, the saltiness of prosciutto and the decadent sweetness of my homemade Cots and Quats Marmalade, made them irresistible.
1-7 ounce tub Saint Andre` Goat CheesePhilo Pastry Bites
5 ounces Philadelphia Cream Cheese
1 cup grated sharp cheddar cheese
1 cup diced prosciutto
1 egg
1 package phyllo pastry
1 stick melted butter
1-16 ounce jar 
Cots and Quats Marmalade (orange marmalade)
salt and pepper to taste


Preheat oven to 425 degrees

Remove phyllo from package and place on a cutting board, cover with a clean damp cloth. In a Cuisinart, blend together the cheeses until smooth, salt and pepper to taste.
Cut prosciutto into small dice and sauté in a dry pan until crisp, set aside until ready to use. (if pan becomes to dry add a few drops of olive oil)


Melt butter in a microwave safe bowl for 30-40 seconds, set aside until ready to use
Begin making phyllo shells by placing one sheet of phyllo dough onto a second cutting board or other clean surface, remember to cover the remaining phyllo with damp towel, brush pastry with a thin layer of melted butter, add another layer of phyllo and brush with butter, continue this process until you have 6-8 layers of pastry

Slice phyllo with a very sharp knife into 4 inch squares, gently press 1 square pastry into small muffin tins allowing a small amount of pastry to drape over the edge, bake on the middle rack of oven for 1-2 minutes or until edges become light brown, remove from oven and fill shell with 1/2 teaspoon cheese mixture, 1/2 teaspoon crumbled prosciutto and then top with 1/2 teaspoon marmalade, bake for additional 3 minutes, cool and serve.


Favorite childhood memory of food?


I have so many! Here is one of my most recent posts detailing a fun food memory with a twist! “Night Crawler Hunting and Frog Gig-gin!”


On any given summer evening, prior to a weekend fishing trip, you could find my three brothers and me standing in the lush street medians between Wood and Cascade Streets in downtown Colorado Springs. Armed with our flash lights and various worm containers where we would comb through the manure laden soil for a host of plump nightcrawlers. As with any hunter I'd done my research before heading out to capture the elusive nightcrawler!


Favorite food tradition?


SANTA HOT CHOCOLATE: During the Christmas Season my family enjoys a rich and diverse set of traditions and almost all of them involve food! Santa Hot Chocolate is at the top of the list!
 
This recipe is highly classified!! It is the REAL DEAL! This perfect cup of sipping chocolate is served to Santa by his beautiful wife Mrs. Clause, right before he heads out on his sleigh Christmas Eve. Pumped high with adrenaline andcoco flavanols, Santa sets out into the night to deliver toys to good little girls and boys. Santa Hot Chocolate is filled with magic and can turn any Grinch into a cuddly teddy bear!
Now you might ask how I came by this classified recipe....living on a strict diet of candy canes and hot chocolate, let's just say there was one elf at the North Pole that was willing to "share" the recipe for a Big Mac Meal, biggie sized with a giant cup of Coke! It's not pretty, but everyone has their price!!
There is certain etiquette that must be followed when drinking Santa Hot Chocolate...
 
First, you must have the correct size cup and saucer. Above, you'll see my youngest daughters set of sipping cups. Both of my daughters received her own set of sipping cups to carry the tradition onto the next generation, when they were about 10 years old. A time honored right of passage.


Secondly, only a cinnamon stick may be used to stir the chocolate, that's where the magic begins...

Lastly, never gulp or "shoot" the chocolate...it can be very dangerous to someone not accustom to the REAL DEAL!! Sip the chocolate like a fine aged brandy and linger in the moment of Christmas cheer!

Recipe:

2 cups table cream (1/2 & 1/2)
1 1/2 cup heavy whipping cream
1/2 cup sugar
1/3 cup cocoa powder (I use Dove but any good brand will suffice)
1/3 cup milk chocolate chips
6-7 sticks cinnamon
pinch sea salt

In a heavy sauce pan heat table cream, 1 cup whipping cream and sugar until sugar is dissolved, add the cocoa powder and whisk until mixed thoroughly, add the chocolate chips and stir until melted, add salt and 2 cinnamon sticks and simmer for 5 minutes.

Make cinnamon cream using remaining 1/2 cup heavy whip cream, blend with a hand mixer till thick add 1/4 stick fresh ground cinnamon and stir

Serve chocolate in sipping cups with a cinnamon stick for stirring, add a small dollop of cinnamon cream and grate fresh cinnamon over the top...

Finally, be prepared for a magical experience!!

Photos courtesy of At Home with Rebecka.

Sunday, December 11, 2011

Sharing Sunday: Flour Arrangements


You are really in for a treat, of all sorts, this week. The blog I am sharing with you, Flour Arrangements, happens to be written by one of the most brilliant women I know. Her blog is about her love of baking and the recipes she makes, but what will capture your heart are the stories that accompany each and every one. I have been fortunate to sample more than a handful of these delicacies first hand. 


She is the woman who brings homemade marshmallows and graham crackers when our families camp together. She is the one who always offers to bring something mind-numbingly good when we invite them over for dinner. She is the friend who wins First Place at the County Fair for her apple pie. She is the woman who has made countless memories for my family because the warmth of her heart and spirit surpass what any oven alone could produce.


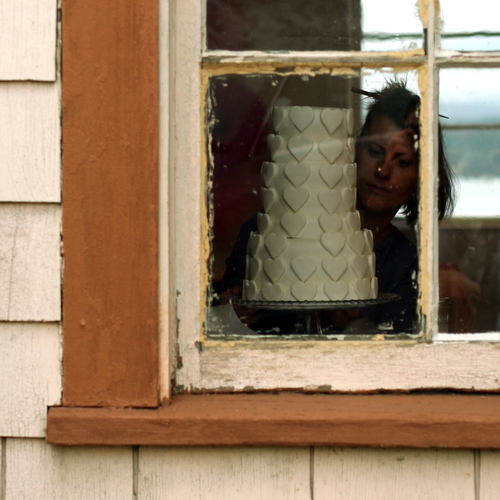
While she can bust out the most amazing loaves of bread and mouthwatering doughnuts, I am truly in awe of her cake making and decorating fetes. Her daughters ask for a dozen roses or an exploding volcano and she will make it happen. She wanted to make a tribute to her mom, who is a wonderfully talented quilter and she produces this and when I think she can't possibly top that she produces a cake for her daughter's play, a cake for her girlfriend's baby shower and a beautiful dream-come-true cake for a special little lady (her mom designed Suzanne's logo---super cute!). Ya see what I mean?


The beauty of Flour Arrangements is that in addition to learning wonderful recipes and techniques, you get to meet Suzanne and her family. Enjoy!


<:~:><:~:><:~:><:~:><:~:><:~:><:~:><:~:><:~:><:~:><:~:><:~:><:~:><:~:><:~:><:~:><:~:><:~:><:~:><:~:><:~:>
Loafing
by Suzanne Cowden of Flour Arrangements


Before I went back to teaching again last year, I used to bake bread several times a week.  We ate plenty and shared plenty.


Working messed with my bread rhythm, though, and finally I started buying bread.  It wasn’t the same, but we all got used to it.


When June brought summer freedom, I thought I’d start baking again.   I did bake a few loaves here and there, but I just never seemed to get back into the bread-baking habit.


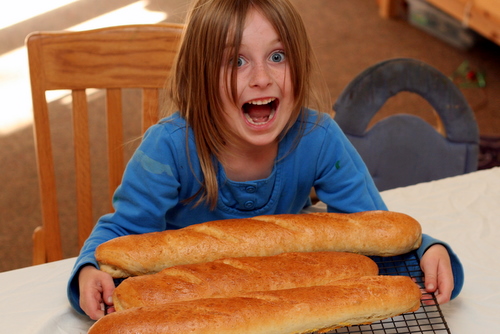
As the summer drew to a close, I found some time to bake French bread.  Eliza nearly ate a whole loaf in one sitting.  She would have eaten more if I’d let her.

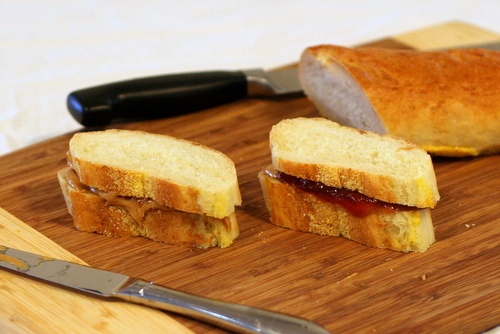
The next day she asked for a peanut butter and jelly sandwich on one of the remaining loaves.  Baguettes are not my go-to for peanut butter and jelly, but she went crazy for them.  She wanted them day after day after day.  The bread didn’t last long.


This week, Eliza started school, and so did I.

My daughter’s enthusiasm for fresh bread prompted me to make a back-to-school decision I hope I can live up to;   I will make time each week — somehow — to bake bread for the peanut butter and jelly sandwiches I’m putting in my first grader’s lunch box.


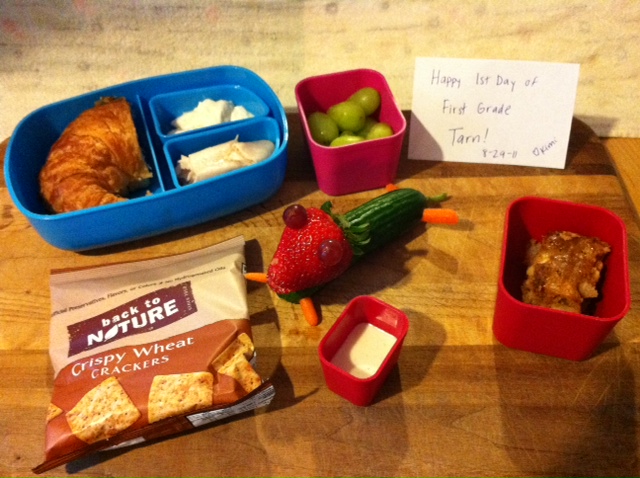
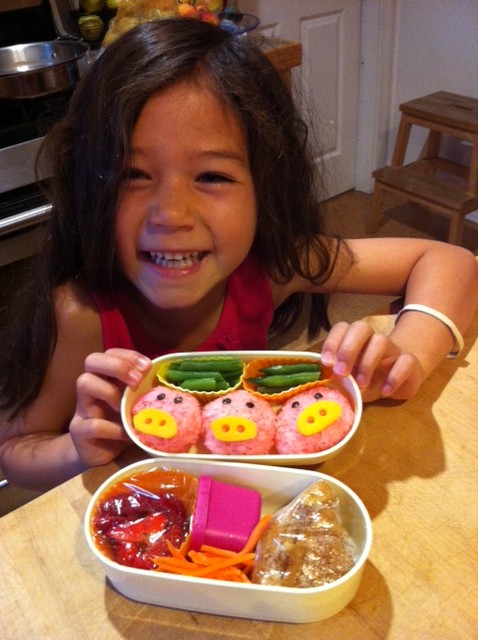
I may not be able to pull off an edible alligator or the three little succulent piggies like my friend Kimi, but at least it’s something.


One week down, 39 to go.  By then, it’ll be a habit.  Here’s hoping, anyway.


French Bread
From The Bread Bible.  Makes three long baguettes or round boules.


2 cups warm water (105º to 115º F)
1 1/2 tablespoons active dry yeast
1 tablespoon sugar
3 cups bread flour
1 tablespoon salt
2-3 cups unbleached all-purpose flour
cornmeal, for sprinkling
1 large egg beaten with 2 teaspoons water, for glazing


Pour the water in the bowl of a heavy-duty standing mixer.  Sprinkle the yeast and sugar over the surface of the water.  Stir until combined.  Let stand at room temperature until dissolved and foamy, about 10 minutes.


Add 2 cups of the bread flour and the salt.  Beat hard with the paddle attachment until smooth, about 3 minutes.  Add remaining bread flour and most of the all-purpose flour, 1/2 cup at a time, until a shaggy dough that clears the sides of the bowl is formed.


Switch to the dough hook and knead for about 3 minutes, or until the dough is smooth and springy.


Place the dough in a lightly greased deep bowl.  Turn once to coat the top and cover the bowl with plastic wrap.  Let rise in a cool area until tripled in bulk, about 1 1/2 to 2 hours.  If you have time, punch down the dough and let it rise again for about an hour.


Gently deflate the dough.  Turn it out on a lightly floured surface.  Line a baking sheet with parchment paper and sprinkle it with cornmeal.  Divide the dough into 3 equal portions.   Shape the portions into tight round balls for boules or flatten each portion into a rectangle for baguettes.  Roll each rectangle up tightly with your thumbs to form a long sausage shape;  roll back and forth with your palms to adjust the length.  Place the loaves 4 inches apart on the baking sheet.  Cover loosely with plastic wrap and let rise until puffy and doubled, about 30 to 40 minutes.


Preheat oven to 450° F.


Slash the tops of the loaves diagonally about 1/4-inch deep and brush the entire surface with the glaze.  After placing loaves in the oven, reduce temperature to 400° F.  Bake for 35 to 40 minutes or until crusty and the loaves sound hollow when tapped with your finger.  Eat immediately or transfer the loaves to a cooling rack.
Visit Suzanne at http://www.flourarrangements.org or on her Facebook Fan Page.

Pin It

Sunday, December 4, 2011

Sharing Sunday: Teens Can Cook, Too!

Well I have to thank Twitter for this wonderful connection.  I saw one of Madison's posts and followed through to read her blog, Teens Can Cook, Too!...and I was blown away!!! At the ripe age of 13, she shows so much promise of what healthy eating can mean to today's youth.
Stop by and check out these yummy looking recipes or check out one of her many videos.

  • Salmon Salad with Spicy Nuts and Cilantro Dressing
  • Vegetarian Lasagna
  • Honey Drizzled Apples and Pears with Melted Gouda
  • Italian Salad with Asiago Cheese Crisps

We had a little Q&A so I could get to know her a little better. Here is what I learned:


How did you get interested in cooking?
I've enjoyed cooking since I was about six years old. I was a bit of a picky eater (Tillamook cheddar cheese chunks, grapes, organic cheerios, other fruits) and was beginning to branch out once I hit Kindergarten. At this point, I ate rice and mashed potatoes like any other normal kid, but I still had an aversion to soups and salads. My mom bought me a Rachel Ray kids' cookbook, and that cookbook was the instigator for my love of gourmet food. Once I got older, I wanted to gain independence in the kitchen. I tried to cook meals from various cookbooks on the weekends. After Jamie Oliver's Food Revolution, I discovered that I was so passionate about his cause that I could make a difference through my own recipes. 

Why did you start blogging?
I started blogging because of, again, Jamie Oliver's Food Revolution. I was beginning to create my own recipes at that time and figured I could combine my enthusiam for healthy eating with my original recipes to create an accessible website.

How do you come up with your recipes?
You'd probably expect me to say I have a method for inventing recipes, but I don't. A lot of them come off the top of my head 3 hours before dinnertime based on a couple veggies we have in the fridge. Other times, my mom will make dinner from a Food Network recipe on weeknights (homework, theatre, dance and Girl Scouts get in the way a bit) and I'll feel inclined to modify the dish over the weekend. I pick up on subtle things that I would change to make the meal fresher, healthier and more suited to how I envision a complete plate of food. Eventually, the recipe has been changed so much that the basic foundations are barely present and the dish becomes my own. 

What influences / inspires your cooking?
I'm inspired by ideas I see on the Food Network or seasonal vegetables and fruits that keep popping up in the grocery store. During the summertime, I try to go with many ethnic cuisines (Italian, Mexican, Asian, etc.) because it is easier to access those types of ingredients in the summer in Washington State. In the fall, I rely heavily on seasonal produce and bold, fresh flavors to tie a dish together. There are so many different flavor combinations that can be tweaked to produce entirely different meals, and when I can tap into flavor incorporation my recipes come to life.

How did you learn about organic foods?
I've been eating organics my whole life, and once I was old enough to understand the difference between organics and naturals, naturals and junk food and so on, I began to learn more about them through documentaries, word of mouth and websites. 

What are you cooking next?
Honestly, I don't even know much about what I'll be cooking next; not many specifics, that is. I know I'll be highlighting seasonal vegetables and the use of canned items (organic beans, for example) for the holidays. I also want to nail down some healthier versions of holiday classics. 

What are your favorite foods to eat during the Fall/Winter?
I absolutely love pomegranates. They are so delicious. I also love eating plums, which are currently at the very end of their growing season. 

What are your least favorite foods?
I don't like seafood, olives or parsnips. Foods like scallops and lobster are much too squishy. I'm perfectly fine with moderately squishy foods like tofu, but seafood is just taking it too far. Other foods like white fish are too bland. To suit my taste buds, you have to blast the fish with an insane amount of flavor for me to eat a few bites. I'm only 13 though, so maybe my tastes will change and my aversion to seafood will dissipate over time. At least I like salmon! 

Where would you like your blog to take you?
I would love my blog to get thousands of pageviews and have hundreds of followers, but I'm not quite there yet. I really want my blog to be a helpful resource to families, kids and adults making a change in their eating. Not only that, but I hope my blog is an inspiration for other teenagers to take action and impact a community's eating habits. 

What is your favorite kitchen tool?
I absolutely adore my Vita-Mix. My family bought one a few years ago and it is fantastic! We make so many breakfast smoothies in it. I like to use it when I cook as well. I made a white bean dip in my Vita-Mix the other day, and it was super creamy and delicious. Although a Vita-Mix is quite the investment, it literally will last you a lifetime! I completely recommend that you purchase one.

     
``=``=``=``=``=``=``=``=``=``=``=``=``=``=``=``=``=``=``=``=``=``=``=``=``=``=``=``=``=``=``
Squash and Sweet Potato Soup
Serves 8


Ingredients:
1 large acorn squash
¼ cup olive oil
2 large sweet potatoes or yams, peeled and cut into 1-inch
1 large onion, diced
1 (15 oz) can diced tomatoes
10 (¼-inch thick) ginger “coins”
2 garlic cloves, minced
½ tsp cayenne pepper
1 tsp curry powder
6 cups chicken broth
3 tbsp milk
2 – 3 tbsp Greek yogurt
Salt and pepper, to taste


Preparation:
1. Preheat oven to 350 degrees Fahrenheit. Cut the acorn squash in half. Drizzle with olive oil and season with salt and pepper. Roast in the oven for 45 minutes to an hour, depending on the size of your squash.


2. While the squash is baking, heat the remaining olive oil in a large pot over medium-high heat. Add onions. Sauté until translucent. Then stir in the tomatoes, garlic, salt, pepper and cayenne pepper. Sauté for about 5 minutes. Stir in chicken broth, ginger coins, curry powder and diced sweet potatoes. Cook until sweet potatoes are fork tender, about 10 minutes on high heat. Remove from heat.


3. Using an immersion blender (also called a Bamix), puree the contents of the pot, and add milk. Once the soup has reached a smooth consistency, add the yogurt and mix thoroughly. Adjust salt and pepper one more time and serve.

Sunday, November 27, 2011

Sharing Sunday: mamawolfe

One of the many reasons I have come to love Voiceboks is meeting fellow mamas like Jennifer Wolfe.  She is an 8th grade teacher, just like me, so I HAD to love her right off the bat. Teachers of tweens and teens are a special breed of people and we get each other. I knew I would be a follower of her blog when I read this post. I have been hooked ever since.


Enjoy her photographic tour of her hometown and PLEASE make sure you stop by her site, Mama Wolfe, to tell her how much you love her! Leave a comment at the bottom for me about which of her posts is YOUR favorite. I find myself wandering all through her site, reading about her stories of her kids, both at home and at school and I long, a little, for my teaching days. 


Thank you Jennifer for hopping on over here to Mental Chew and sharing your wonderful gift with us!


=~==~==~==~==~==~==~==~==~==~==~==~==~==~==~==~==~==~==~==~==~==~==~==~==


Take A Walk With Me: Davis, California 
by Jennifer Wolfe

Spend a weekend in Davis and you won't be disappointed. A small university town located in between the Pacific Ocean and the Sierras, Davis is a magical place to live. Come take a Saturday morning walk with me and I'll show you what I mean! 
Starting near my house, it's an easy walk to campus. Living in a university town means there's always something interesting going on. The University of California, Davis, adds about 33,000 students to our town each year. First started in 1905 as an offshoot of U.C. Berkeley, Davis has become well known for its strong academic programs. In fact, it's the third largest public university in California!
Davis is known for being a beautiful place to live. I love walking under these huge walnut trees on my way to campus. The campus itself is 5,300 acres, making it the largest of all the University of California campuses. 
The Egghead sculptures, by Robert Arneson, are scattered all over campus. This is one of my favorites-it sits in front of the library. 
My dog Cola and I spend hours walking along tranquil Putah Creek which runs right through the campus. There is amazing wildlife to see- rabbits, ducks, birds, turtles, and even an occasional peacock keep us busy! 
Sometimes it's nice just so sit and watch the world go by. 
Most times of the day and night the arboretum is full of walkers, joggers, and students studying wildlife or tending the many international plant species growing along the creek. 
All the plant diversity creates beautiful pockets of color that change with the seasons. 
Moving off campus towards downtown we find Central Park , currently home to a peaceful Occupy Davis camp. Central Park is our version of London 's Speakers Corner and Berkeley 's People's Park, and there's always something interesting going on there. 
One of the most popular attractions in Central Park is our Farmer's Market. Open Saturday mornings and Wednesday nights, residents are able to take advantage of living in the fertile Central Valley of California. Davis is one of the most bike friendly cities in the US-many people take advantage of our superb bike paths and commute to work, school, and for pleasure. 
 Davis is a very welcoming city-unless you're trying to bring your pet into the market!


Fresh organic produce, delicious prepared food, artisans and live music ensure that young and old will all have a great time at the market. 
Don't you think you'd like to take a trip and come to visit? I know you'll enjoy discovering everything our great town has to offer-there's so much more to see! Please visit my blog, mamawolfe, to read more! Stop by http://mamawolfe-living.blogspot.com and check it out!

Save 20% on Linen colored Le Creuset pieces from Williams-Sonoma. Limited time only!

Sunday, November 20, 2011

Sunday Sharing: Fun with Leaves featuring Hurrayic

~~Featured Blogger~~
Hurrayic
When I saw this post on hurrayic, I immediately emailed Ellen to see if she would be interested in a guest post. I think these are just brilliant and we are heading out tomorrow to gather leaves that we will use to create fun images later in the week. Take some time to enjoy the photos, recipes and more on her beautiful blog.


=~=~==~=~==~=~==~=~==~=~==~=~==~=~==~=~=
Fun with Leaves 
by Ellen Crandall
As mentioned yesterday, we had a very full weekend so when Monday morning arrived I brought out the glue, paper, paintbrushes and leaves we had pressed several weeks ago.


We needed something creative that also offered immediate results.
I have had this book sitting on my shelf for over ten several years now, and rather than pull it out and think, "oh, that would be nice to do...someday..." and replace it in its spot as I have done for the past ten plus several years, we finally put it to good use as inspiration.
So my kids set to work and roughly 45 minutes later, we had a...
a swooping swift...


a dog who looks like he's dancing...

a rather ferocious looking reptile...

 and a mischevious mouse!


All of them loved this and would like to make more...


Definitely a good way to start out the week.


Here's another site that shows some very neat leaf animals by the author.

Sunday, November 13, 2011

Sharing Sunday: Icing & Crumbs

Since I began blogging. I have become part of an inspiring community of blogging women. Oh ok, and a couple of guys out there too!!  During conversations with friends I would find myself saying, "Oh on this blog there is......" quite a bit. As a person, I have always been about celebrating someone else's joy with them. When a friend has an achievement, I feel such a deep sense of pride for them.

With that in mind, I am going to start "Sharing Sundays". The idea is to share some of the amazing blogs I have been lucky enough to frequent over the past months / years. With that I wanted to start with Icing & Crumbs

Kristina is incredibly humble. She is a recipe machine. A GOOD recipe machine and a great writer. Although I have never talked to her, I can hear her through her writing. We reached out to each other and found that we had a lot in common beyond being island moms.

Born and bred in Australia (as well as several years spent living in the mid-west of the US), she now lives on the beautiful island of O'ahu, Hawaii. She is a mother to two beautiful children. She loves to cook and eat healthy foods, and she started blogging in hopes of passing these loves onto her young children. Lucky kids. 

Here are a few of my favorite recipes, but when you explore her blog, don't stop at the recipes. There is so much more!


And now we are lucky enough to have a post from her!! Thank you Kristina for joining us here.
=~=~=~==~=~=~==~=~=~==~=~=~==~=~=~==~=~=~==~=~=~==~=~=~==~=~=~==~=~=~=

   
Sweet Memories
by Kristina Hoy

I have wonderful memories of my mother’s desserts growing up… especially those made when we had dinner with friends. Never plain or ordinary, her dishes were rich, full of flavour, and presented with an artistry usually seen among professional cooks. There is one dessert I remember particularly well – constructed in a manner similar to the savoury version, this sweet pizza was simple to make and looked amazing – the round biscuit crust, made from crushed cookies, was topped with a layer of cheesecake-like mixture, and then decorated with slices of fresh, colourful fruit, their brightness glowing through the brush of thin glaze.

My children love dessert… small bowls of ice-cream decorated with sprinkles or little chocolate chips; soft vanilla cupcakes topped with fluffy pink icing; tiny squares of brownies, their dark, fudgy crumbs smearing little fingers and lips as they are quickly eaten up… Ideally, I’d like for my children to have desserts that are always healthy (most nights dessert consists of just a small bowl of yoghurt and some fruit), but I am constantly drawn to the sweet dishes first made by my mother… Wanting to make a healthier version of her fruit pizza, I set to work in the kitchen today…

Little Fruit Pizzas
You need:
For the base-
240g of plain flour
1 teaspoon of finely grated lemon zest
120g of butter
3-5 tablespoons of cold water (enough to bind, but not leave the dough sticky)
½ cup of jam (warmed)

For the topping-
1 cup of ricotta cheese
1 teaspoon of cinnamon
1 teaspoon of honey
fresh fruit

You do:
To make the base, place the flour and lemon zest in a mixing bowl and, using your fingers, rub the butter through until the mixture resembles breadcrumbs. Slowly add the water and mix until the dough forms a smooth (but not sticky) ball. Shape the dough into a disc, cover in clear wrap, and refrigerate for about 20 minutes.

Pre-heat the oven to 220 degrees Celsius (420 F). When the dough is ready, roll it out until it is a couple of mm thick, and using a large cookie cutter, cut into the desired shapes. Place the shapes on a lined tray and top with the warmed jam. Bake for 10 minutes, or until the edges have just started to turn golden.
 
Remove the tray from the oven and allow to cool completely.
To make the topping, place the ricotta, cinnamon and honey in a small bowl and stir until evenly combined. Spread a layer of this onto each cooled base and top with pieces of fresh fruit.

These little fruity pizzas are so easy and so much fun to make with the kids! They can help mix and roll the dough, cut the shapes out and put the toppings on. It doesn’t matter what type of jam you use – we used apricot and blackberry, but any will do. We used mostly fresh fruit (watermelon, rockmelon (cantaloupe) and kiwi-fruit), as well as some dried blueberries – the combination is up to your imagination! If you don’t want to make all the pizzas at once, any left over uncooked dough or ricotta mixture can be kept covered in the fridge for a couple of days. The recipe above makes 10-12 small pizzas (depending on the size of the cookie cutter).


“Memory is a way of holding onto the things you love,
the things you are, the things you never want to lose.”

(The Wonder Years)


Pin It